Species
Species is a group of similar individuals.
While biomes and sub-biomes are groupings of species, species themselves are groupings of spawn-able assets (meshes, blueprints, FXs, lights, decals etc).
In Forest biome you might have species such as:
- Trees
- Bushes
- Forest floor
Those might be even more specific like:
- Large trees
- Medium trees
Or even:
- Conifer
- Poplar etc.
Growth
Spawn Points Settings decides where candidate instances may appear.
Depending on the growth mask output, the instances may spawn more sparsly as well.
Growth Mask is a material mask that controls how densely species spawn.
When the Growth Mask outputs a value of 1.0 in some region, the species spawns with the highest density (equal to Spacing).
When the Growth Mask outputs a value of 0.0 the species doesn't spawn at all.

Spawn Point Sources
Species use the Spawn Points Settings array in the Growth category to decide where candidate points come from.
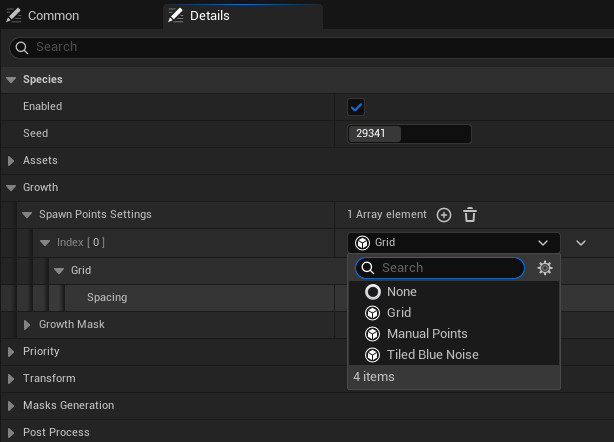
The available sources are:
Tiled Blue Noise: the default irregular pattern. This replaces the olderSpacingand pattern seed properties. Existing Species are migrated to this source automatically.Grid: an exact regular grid with rows and columns.- Manual Points: points collected from
Biomes Manual Spawn Point Componentcomponents in the level.
You can add more than one source to the same Species. Errant Biomes combines the candidate points, then evaluates the Species Growth Mask, priority, asset group, scale, rotation, and other generation settings as usual.
Priority
The priority mechanism resolves "collisions" between various species.
Species with a higher Priority grow "over" lower priority species.
If a species has Priority Radius larger than 0.0 then it will remove lower priority instances of other species within that radius.

Assets
Species can spawn anything that has an Actor Factory. Typically that's everything you can drag-and-drop from the Content Browser onto the level.
- Meshes spawn as instances. Instances are setup using Species Instances Settings.
- Static meshes can spawn through regular instanced components or non-hierarchical ISM components, depending on the selected instance component template.
- Skinned mesh assets can spawn as instanced skinned meshes for Nanite Foliage workflows.
- Niagara systems are spawned as components into shared actors instead of one actor per effect.
- Non-mesh components are usually spawned as separate actors - with one component per actor - behaving as if they were drag&dropped onto the level by hand. To spawn such non-mesh components in shared actors, they need to be spawned using InstancebleBlueprints.
- Blueprints should be spawned as InstancebleBlueprints whenever possible as this allows extracing meshes from them and spawning these meshes as instances in shared actors. Spawning Blueprints directly (without Instanceable Blueprints) should be limited to small counts as such Blueprints are spawned as separate actors and their meshes are not instanced.
Nanite Foliage
Errant Biomes supports Unreal's Nanite Foliage workflow.
To use it:
- Enable and configure Nanite Foliage in Unreal for your project.
- Add the skinned foliage asset to a Species asset group.
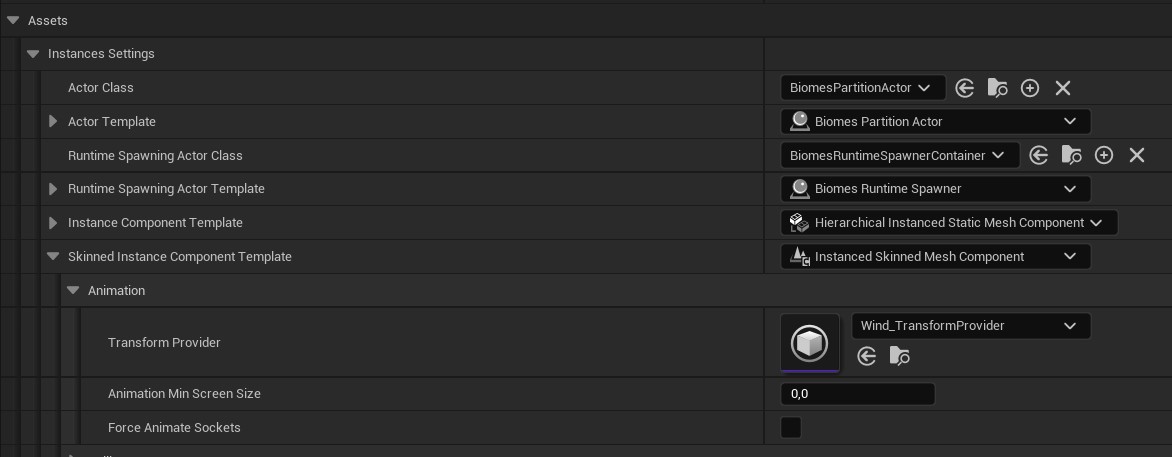
- Configure
Skinned Instance Component Templatein the Species Instances Settings. - If the foliage uses wind, set
Transform ProviderinSkinned Instance Component Template -> Animation. - Regenerate the affected Biomes components.
Epic currently marks Nanite Foliage as experimental. Validate the target-platform behavior for your project before shipping with it.
Drag and Drop
You can quickly add multiple assets by dragging and dropping selected assets or species from the content browser onto a group or a group array. When dragging over a species, it will copy all the assets within it, along with their parameters, into one group.
Instances Settings
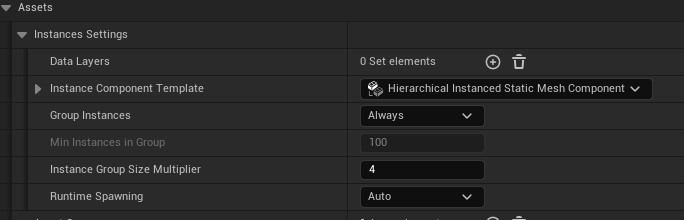
Used to control settings of spawned assets.
Instance Component Template
This property allows for changing/tweaking the instance component used for spawning meshes.
Desired Max Draw Distance and collisions.Skinned Instance Component Template
This property controls the component template used when spawning Nanite Foliage assets. Configure it for Species that use Unreal's Nanite Foliage asset path.
If you need wind, set Transform Provider in Skinned Instance Component Template -> Animation. Without a transform provider, the foliage can still spawn, but wind animation will not be driven.
Instance Group Size Multiplier
The biomes generate as separate components, but you can group spawned instances from multiple tiles together.
This may affect the performance of your world.
Bigger groups render more efficiently while smaller groups load in smaller chunks during streaming. So the choice is between rendering performance, memory usage and potential streaming hitches.
As bigger groups spawn into a single actor this also effects how development of the map works as only one developer can check-out/lock an actor in the source control.
There's no one size fits all to this setting.
Instances best practices
- Disable shadows whenever you can.
- Enable physics only on assets that need collisions. Disable it for all the grass, bushes, small rocks. Having to many objects with collisions streamed-in leads to hitches.
- Always set
Desired Max Draw Distance. Set it to a distance from which you shouldn't see the species anyway. It's one of the most important settings! It can do wonders for optimization. - Use
Density Scalingon objects that can gradually disappear with distance.- Set
Instance Start Cull Distanceto when assets should start disappearing - Set
Instance End Cull Distanceto when assets stop being visible - Set
Desired Max Draw Distanceto just a bit more thanInstance End Cull Distance.
- Set
Asset Groups
A species may have its assets split into multiple groups.
Groups allow you to spawn different set of assets depending on the Asset Group mask output.
Groups Example
You could have Trees species that contains groups such as:
- Large Trees,
- Medium Trees
- and Small Trees.
You could then use a mask to spawn smaller trees on the edges of the trees growth regions.
Asset Group Mask
Asset Group material mask should output values between 0 to 1.
Created Asset Groups are spaced evenly between 0 and 1 based on how many groups you have.
Meaning that if you have only 1 asset group. Then it doesn't matter what value your mask outputs.
If you have 2 asset groups the values below 0.5(1/2) select the first asset group and values higher than 0.5 select the second asset group.
| Mask < 0.5 | Mask > 0.5 |
|---|---|
| first group | second group |
If you have 3 groups the values below 0.333 (1/3) select the first group, values between 0.333 and 0.666(2/3) select the second group and values higher than 0.666 select the third group
| Mask < 0.333 | 0.333 < Mask < 0.666 | Mask > 0.666 |
|---|---|---|
| First Group | Second Group | Third Group |
Asset Probability
Each asset in an asset group has an Asset Probability which tells how often you want this asset to spawn compared to other assets in the same species.
If you have only 2 assets, with spawn probability of 1.0 and 0.5, it has the same meaning as two assets with probability of 0.666 and 0.333.
The probabilities don't need to sum to one.
Simply give higher values to assets that you want to spawn more often and lower values to the ones you want to see less.
Runtime/Offline Spawning
There are two mechanisms for spawning objects - Offline and Runtime.
Offline Spawningplaces instances during the generation process in the Editor.Runtime Spawningplaces instances dynamically in game/editor, around the camera.
You can choose which mechanism to use for each species using the Runtime Spawning property in Instances Settings
or you can set this property to Auto.

Offline Spawning
Offline spawning allows for more optimization techniques such as HLODs.
That's the mode you want to use for objects like trees or big rocks.
Runtime Spawning
Runtime Spawning allows for spawning dense objects like grass or small rocks.
It allows you to spawn instances more densly as you only store some of them in the memory/disk at any given time.
Desired Max Draw Distance setting inside Instance Component Template decides when instances should spawn.If that setting is missing Instance End Cull Distance is used.
If that is missing some default fallback value will be chosen.
Setting this value too high will lead to performance problems. You should set it as low as possible in your scenario.
Runtime Spawning streams-in and out the spawner actors and then generates instances near the camera.Offline Spawning relies only on streaming.
With correct streaming setup you could achieve a similar memory (RAM) usage with Runtime and Offline spawning, but disk usage would be much higher in the Offline case.
Auto modeTransforms
You configure transforms that are applied to your instances in the Transforms properties.
Here you can select how landscape affects the instances' rotation, apply offsets and randomness to instances' transforms.
You can control the scale of the instances procedurally, by using a using a Scale Mask material.

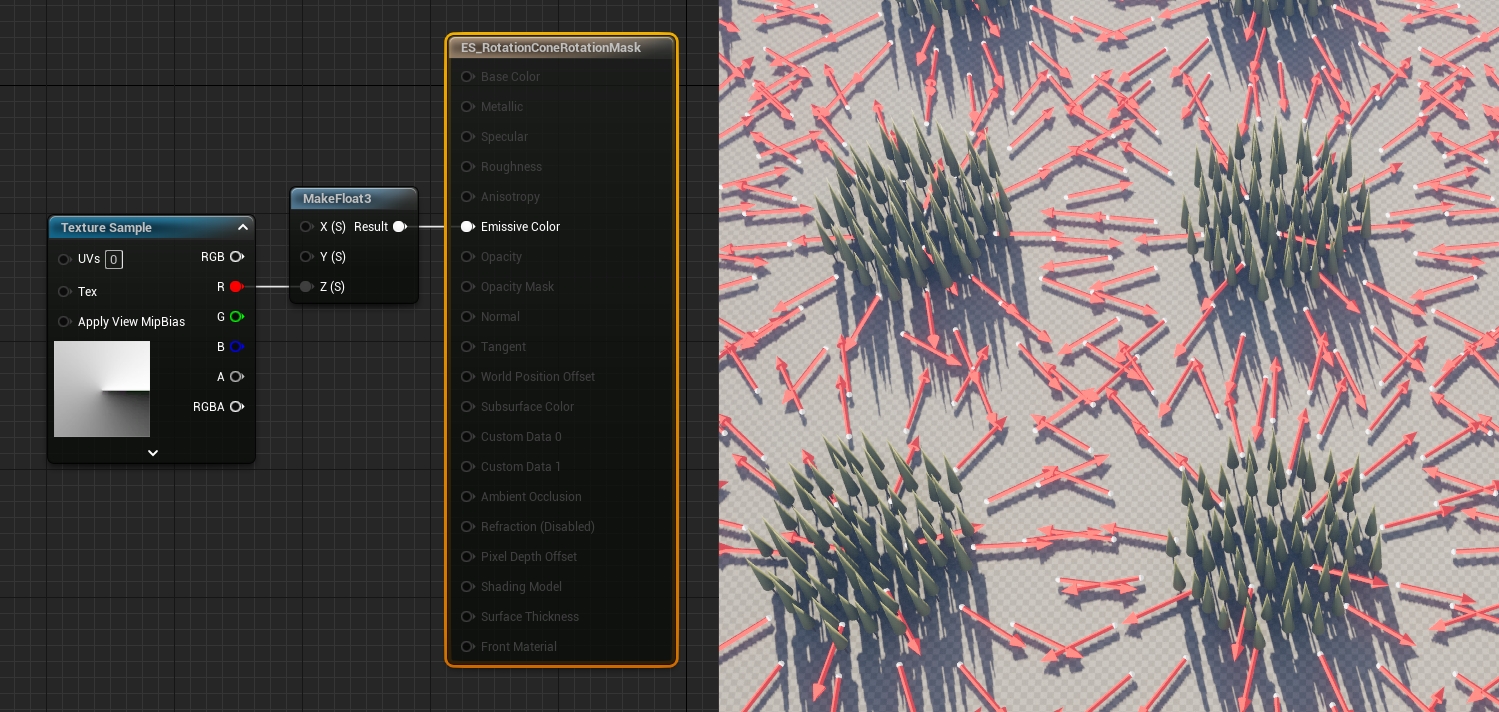
Rotation Mask
The rotation mask allows you to procedurally set spawned instances' rotation.
This rotation will be applied on top of the other rotation you specify, like Random Rotation.
Values in this mask represent full-circle rotation.
So the value of 1 means full circle and the value of 0.5 will mean 180 degrees.
This value range was chosen instead of full degrees to allow easier control through masks and noise.
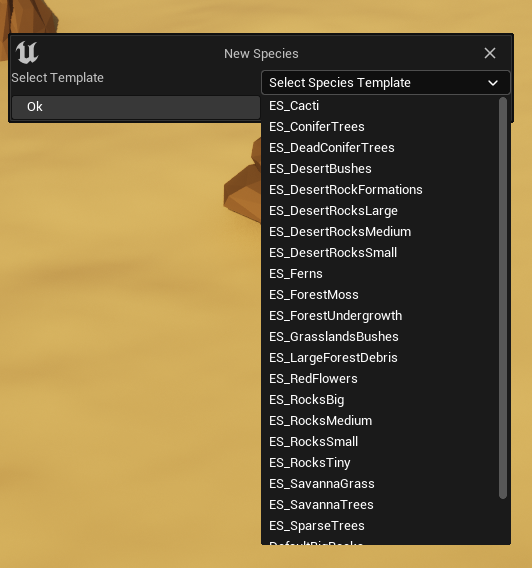
Species Templates
When creating species, a list of template options is provided to you as a starting point. If you wish, you can also include your own templates by adding a folder where you keep your templates in the project settings.
Any species can be used as a template without any additional work.
Configuring Templates Directory
Open Project Settings and go to the Errant Biomes section inside of the Plugins Category.

Inside the Templates Category, there is a Project Templates Directories array where you can add directories that will be scanned for species to be used as a template.

Add a directory where you wish to store templates.
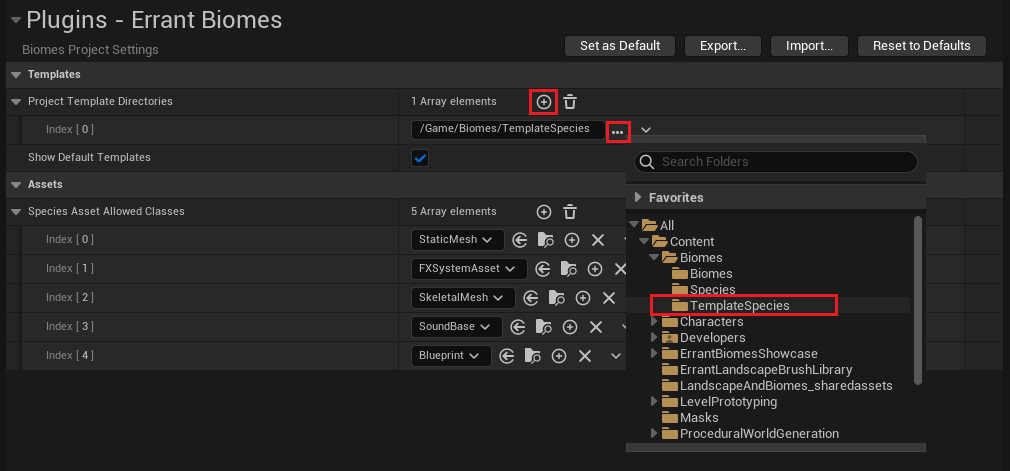
Place species you wish to use as a template in the previously configured directory.

Now every time you create a new species, you will be provided with templates you put in that directory
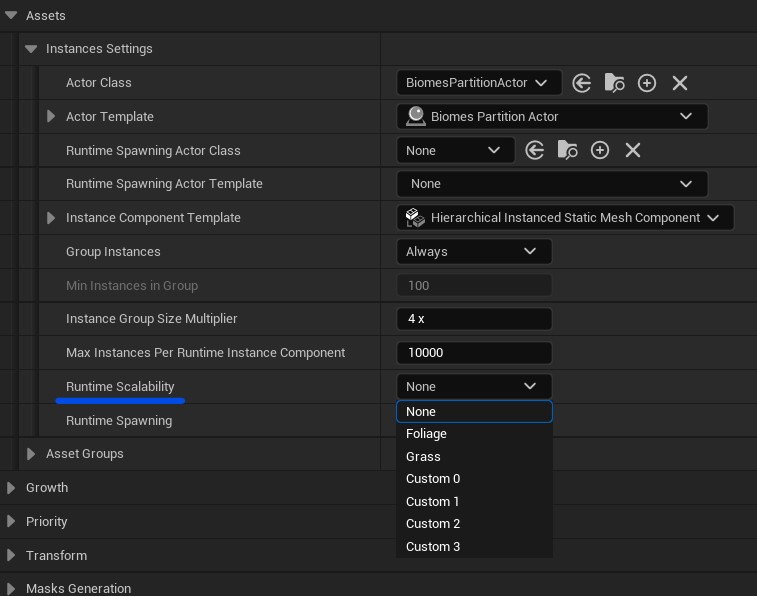
Runtime Scalability
You can control how densely runtime-spawned species generate by adjusting the Grass and Foliage scalability settings or by using the Custom Group settings.
Per-species control is available in the Instances Settings through the Runtime Density Scaling property.
You can also globally scale spawning distance for all species using the biomes.rt.SpawnDistanceScale cvar.
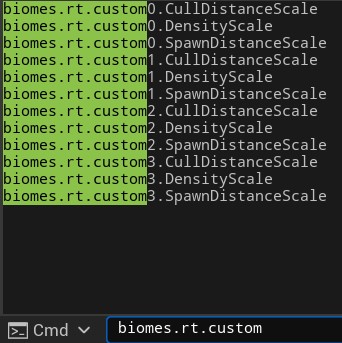
Custom Group
Four custom scalability groups are available for runtime-spawned instances, allowing you to configure species-specific behavior separately from Grass or Foliage settings.
These are exposed as biomes.rt.custom[0-3].DensityScale and biomes.rt.custom[0-3].CullDistanceScale, and function the same way as their Grass/Foliage equivalents.
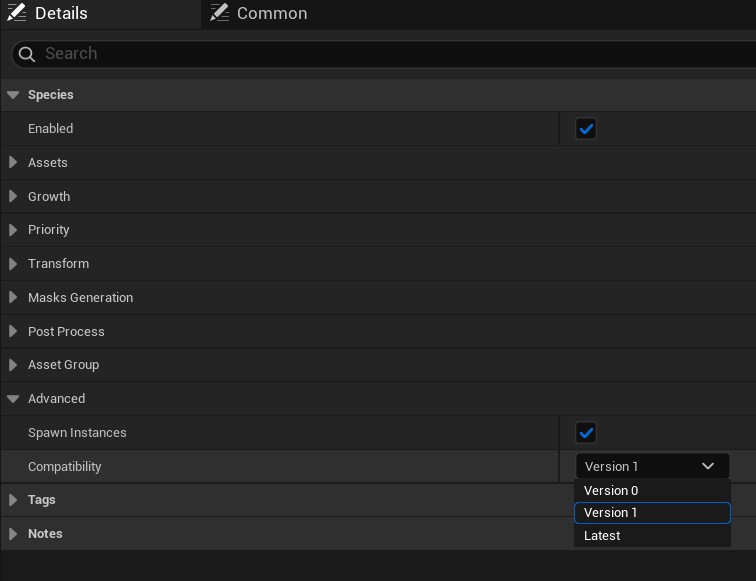
Compatibility Versioning
Some bug fixes require changes to the generation logic, which can alter the resulting output. Because projects using our plugins may be at different stages of development, some teams might have already approved the appearance of their generated areas and prefer to keep them unchanged.
To accommodate this, species include a versioning property that allows projects to opt in to newer generation behavior while leaving existing content unaffected.
You can find this property under Advanced->Compatibility.