Cables and Attachments
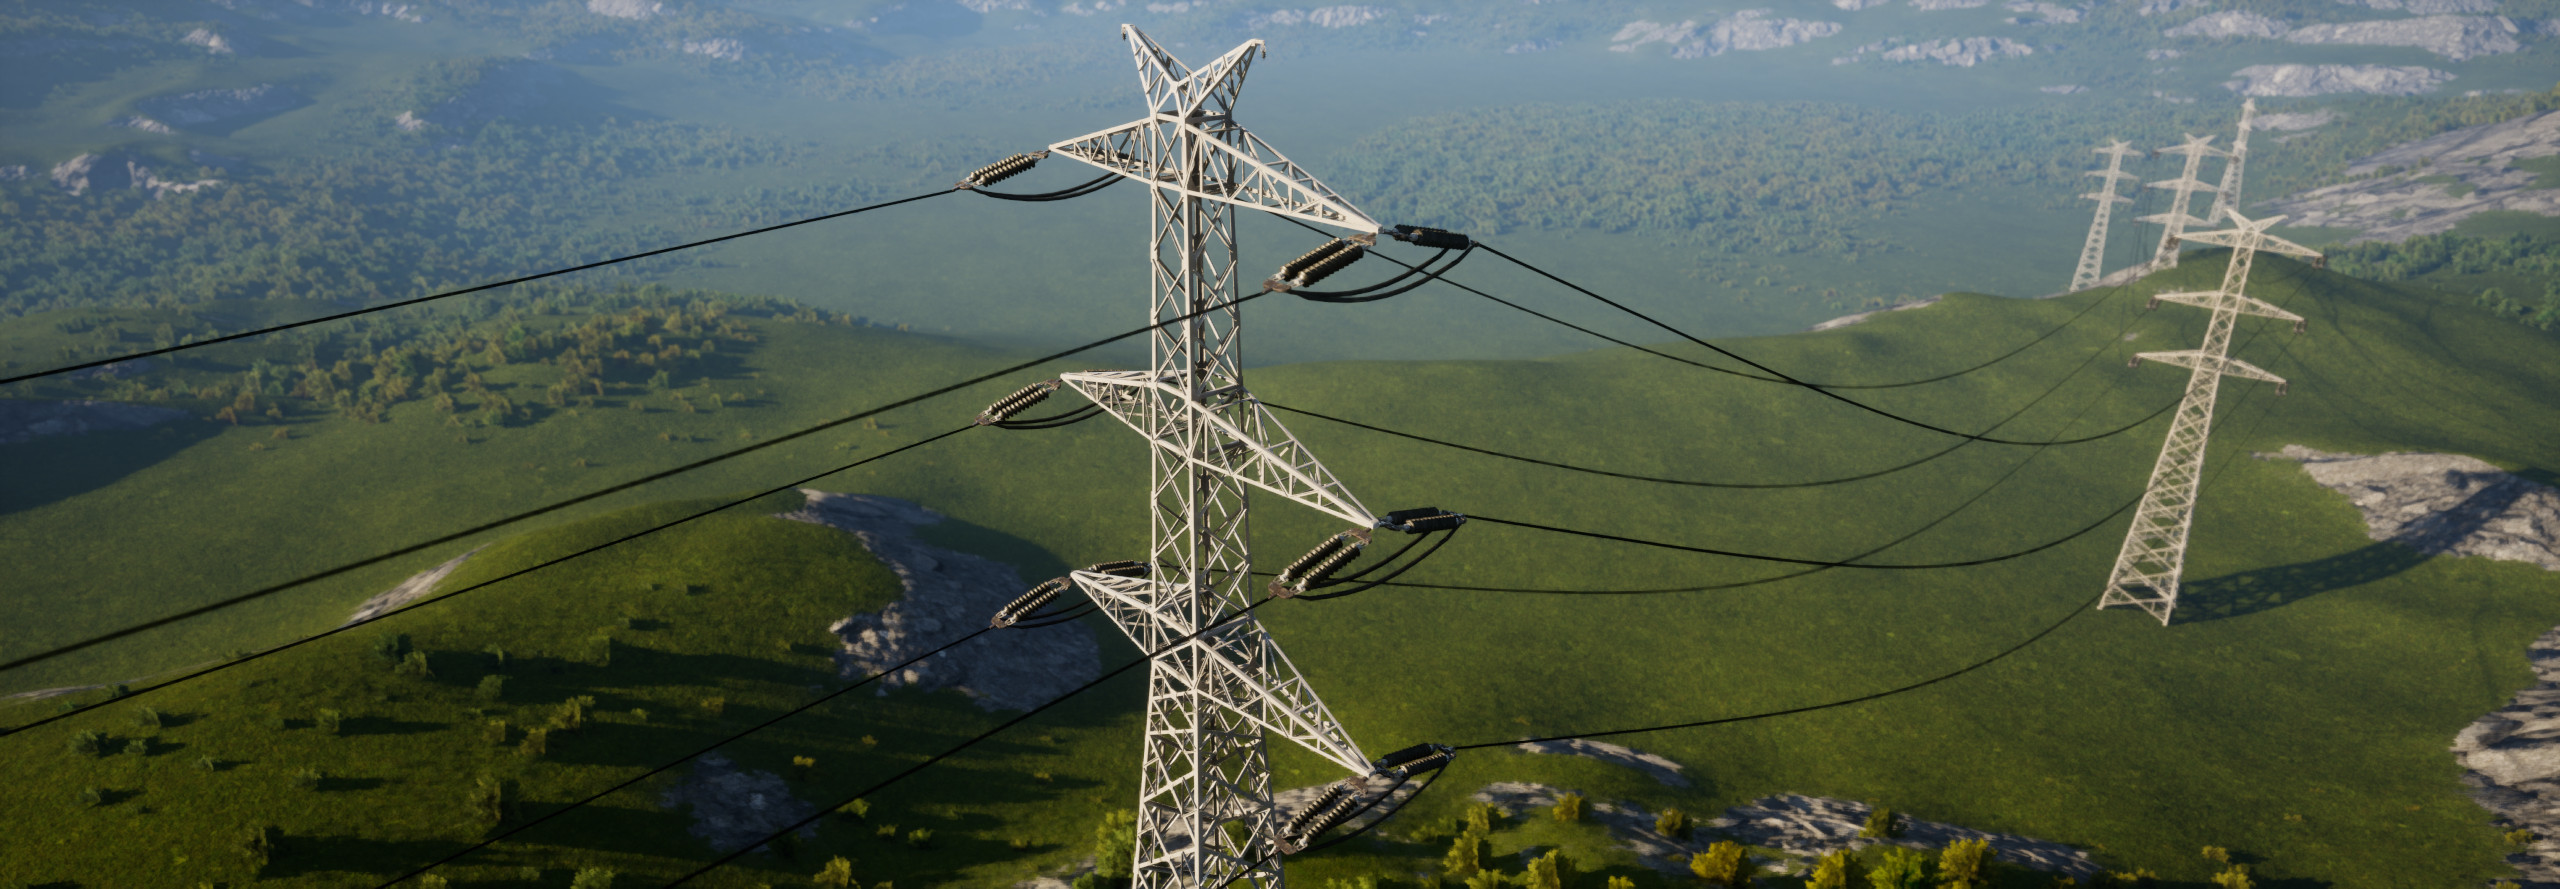
Errant Paths plugin supports attaching cables and meshes to points along a Path, making it easy to construct structures like power lines, suspended bridges, and banners. The plugin and our AssetLibrary include examples that you can use or adapt when creating new Path types.
Attachable component types
The system supports three types of attachable components:
- EpPathTemplateStaticMesh - perfect for beams or cables/wires that don't need to react physically with their environment. StaticMeshes are the cheapest to render and support instancing, which makes them suitable for large-scale use. They can utilize materials/shaders to simulate downward bending and wind-swinging effects with minimal performance cost (except for shadow recalculation). Such meshes can also have collisions, but such collision cannot be animated using the material.
- EpPathTemplateSplineMesh - similar to the StaticMesh, with the added support for bending and orienting its start/end freely. SplineMeshes are more expensive to render and don't support instancing.
- EpPathTemplateCableComponent - required when cables need physical interaction, such as bending over obstacles, reacting to collisions, or influencing other objects. Significantly more computationally expensive than StaticMeshes, due to the simulation cost.
To achieve the best performance, consider using StaticMeshes for most cables, and dynamically convert them into CableComponents when interaction or destruction occurs. This can be achieved with our Errant Instance Interaction Plugin plugin.
Alternatively, consider implementing a mechanism that disables physics simulation for the CableComponents when the simulation isn't needed or the cable is far away from the players/cameras.
Disabling WorldPositionOffset in the cable's material/shader can also boost performance, as WPO usage triggers rerendering of the shadows in the nearby area. A sensible approach is to scale-down the WPO effect with the view distance and use "World Position Offset Disable Distance" in the mesh to disable WPO completely at larger view distances.
Additionally, it is always recommended to set the "Desired Max Draw Distance" on the mesh.
Attachment Targets and Target Resolvers
A component can be attached to one or two targets. A target can be a point in space or a mesh socket.
The process of identifying targets is handled by Target Resolvers, which use various algorithms to determine suitable matches. You can utilize the built-in resolvers provided by the plugin or create custom resolvers tailored to your project. Target resolution takes place after all Path components are spawned but before StaticMeshes are converted into instances. Resolvers can operate within a single Path or across interconnected Paths.
Identifying targets accurately is crucial, as incorrect identification can result in issues such as the cable connecting both ends to the same point, connecting backwards, not connecting at all, or connecting to a distant point.
Attachments are configured in the component properties within a PathTemplate, under the "Errant Paths" category.
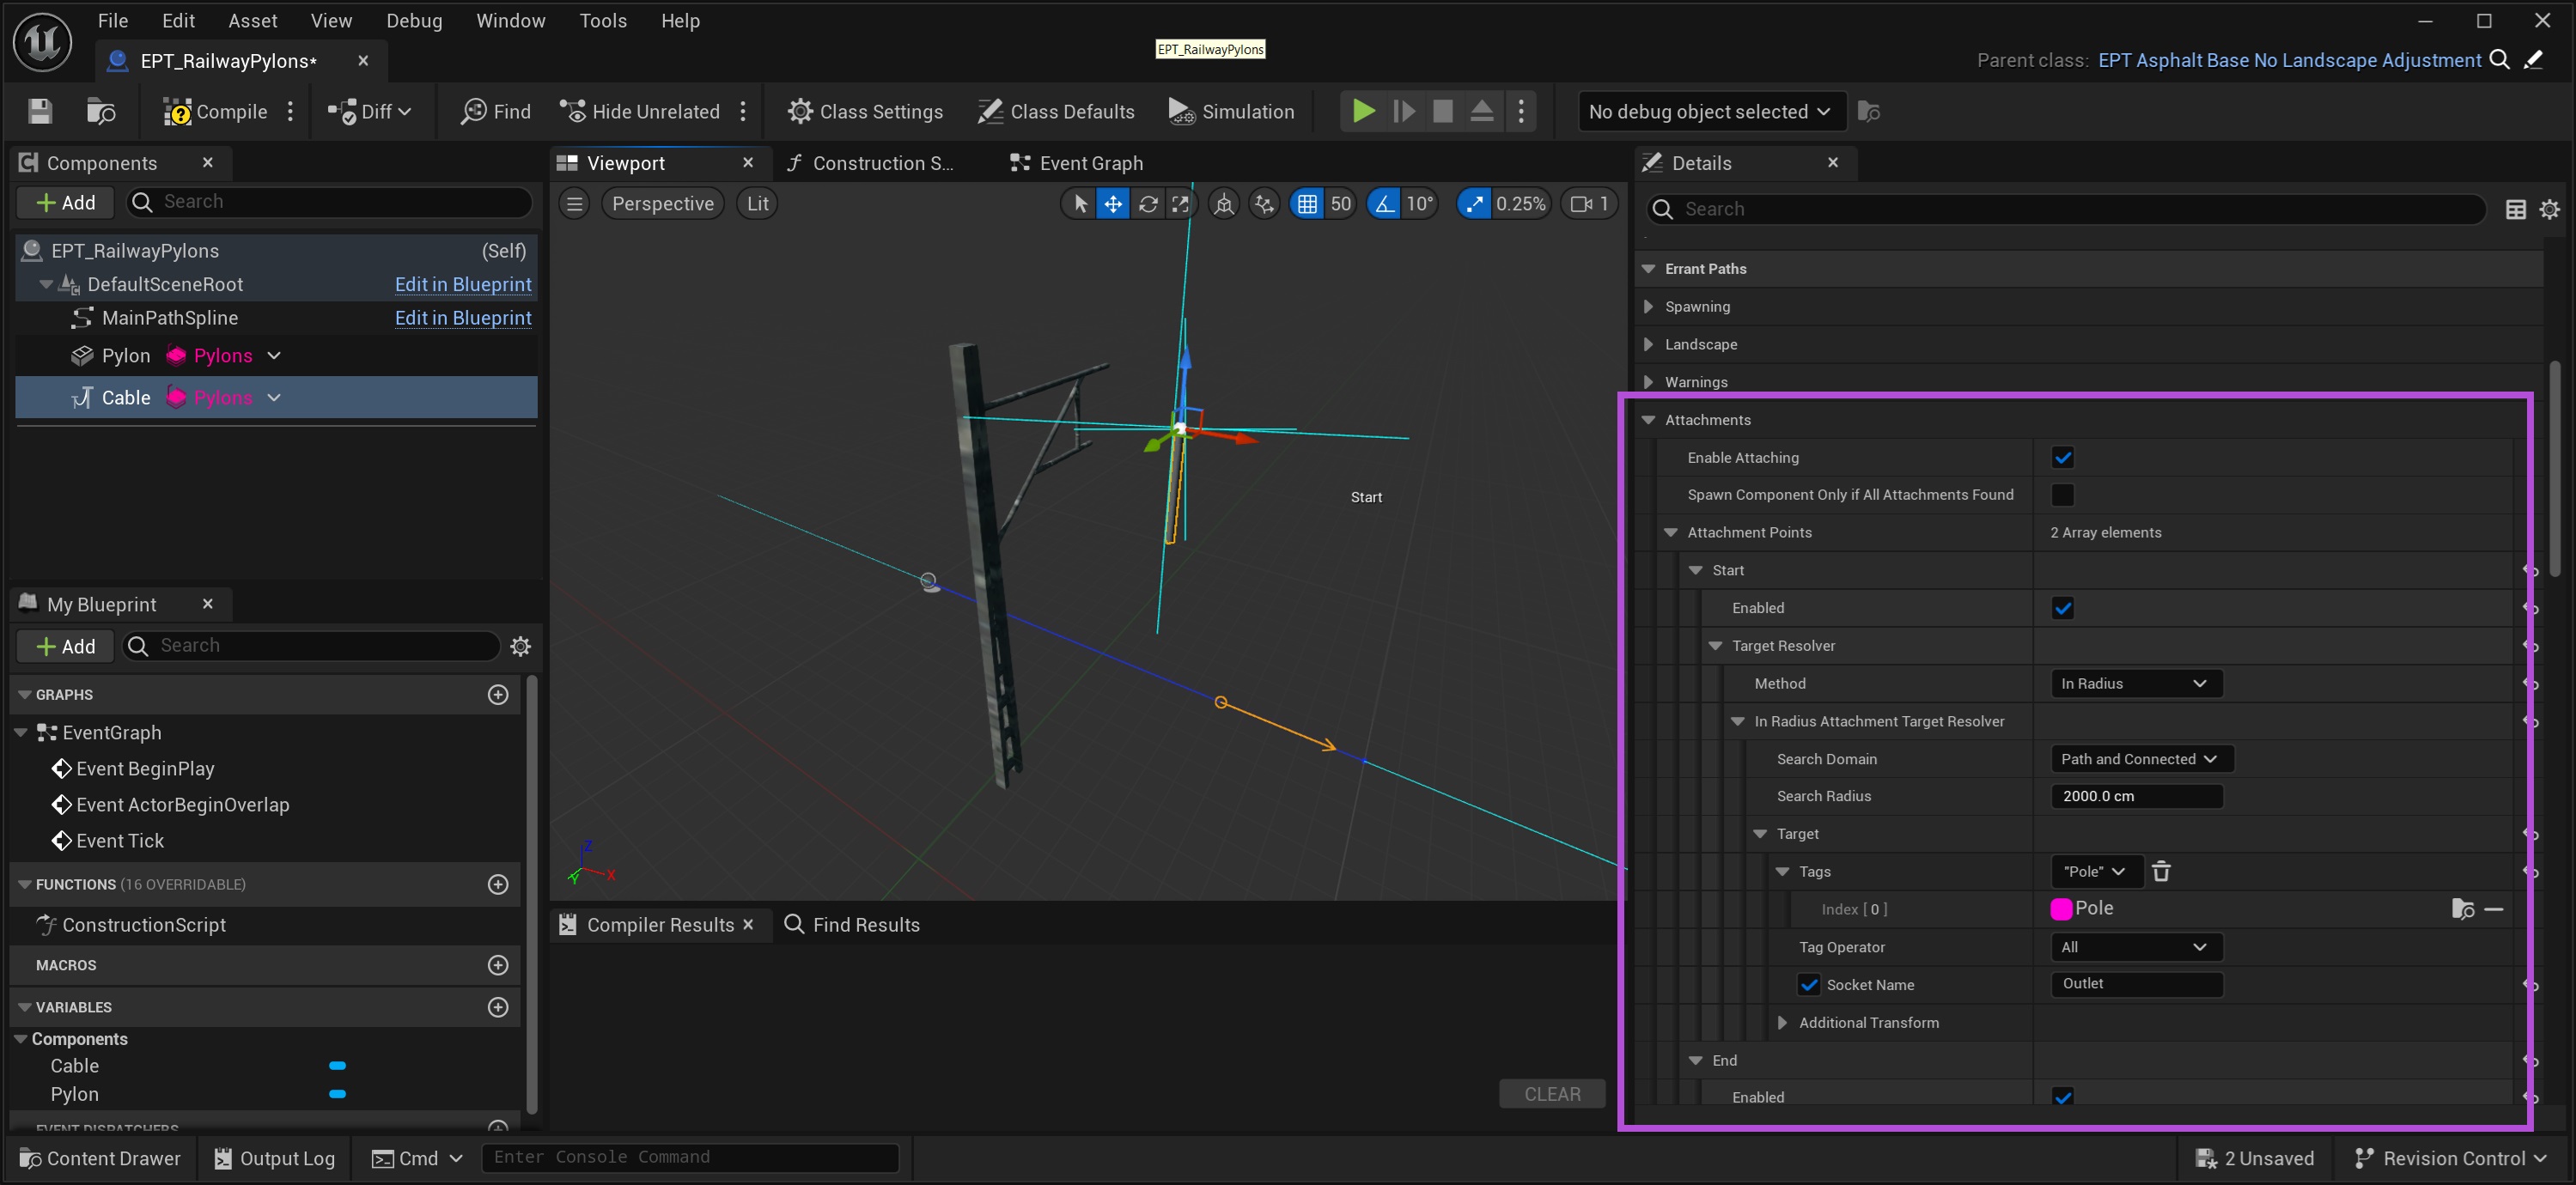
In-Radius Resolver
The In-Radius Resolver (EpInRadiusAttachmentTargetResolver) identifies attachment targets by searching within a specified radius around the component's original attachment point location. It selects the nearest target that meets all defined criteria.
When this resolver is used, debug visuals are displayed in the Blueprint Editor viewport. The search area is displayed as a circle, the search origin marked by a blue cross accompanied by a label. If a valid attachment target is found, its transform is visualized as a rotated point (in this example, it's on the pole).
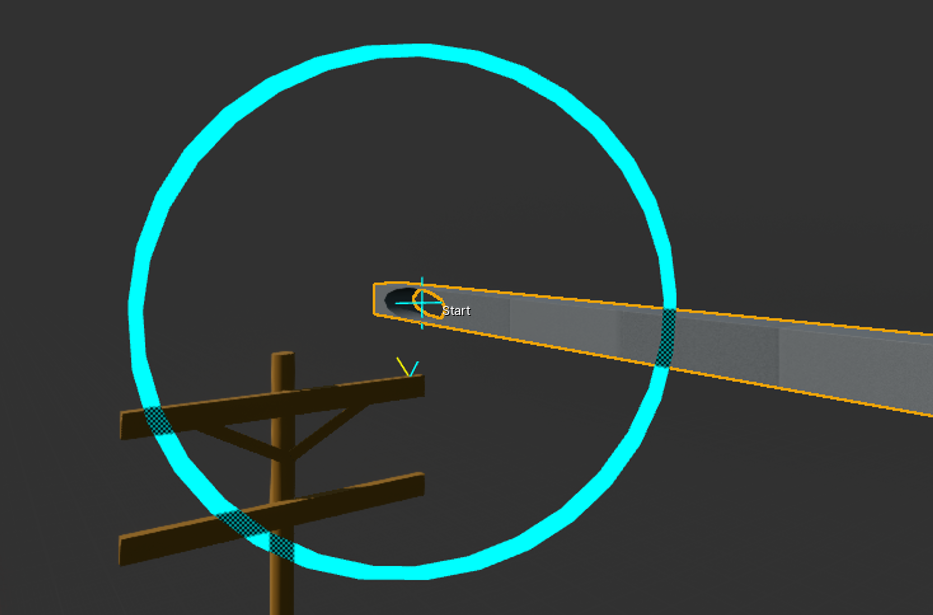
When setting up poles or towers connected by cables, the PathTemplate Blueprint typically contains only a single tower. As a result, only the start target can be identified and visualized in the Blueprint.
When the Path is spawned in the level, the start and end targets are re-evaluated and may be identified differently. For instance, if a tower is set to spawn conditionally but does not spawn, the cable intended to attach to it might either connect to another object or remain unattached altogether.
Resolver setup
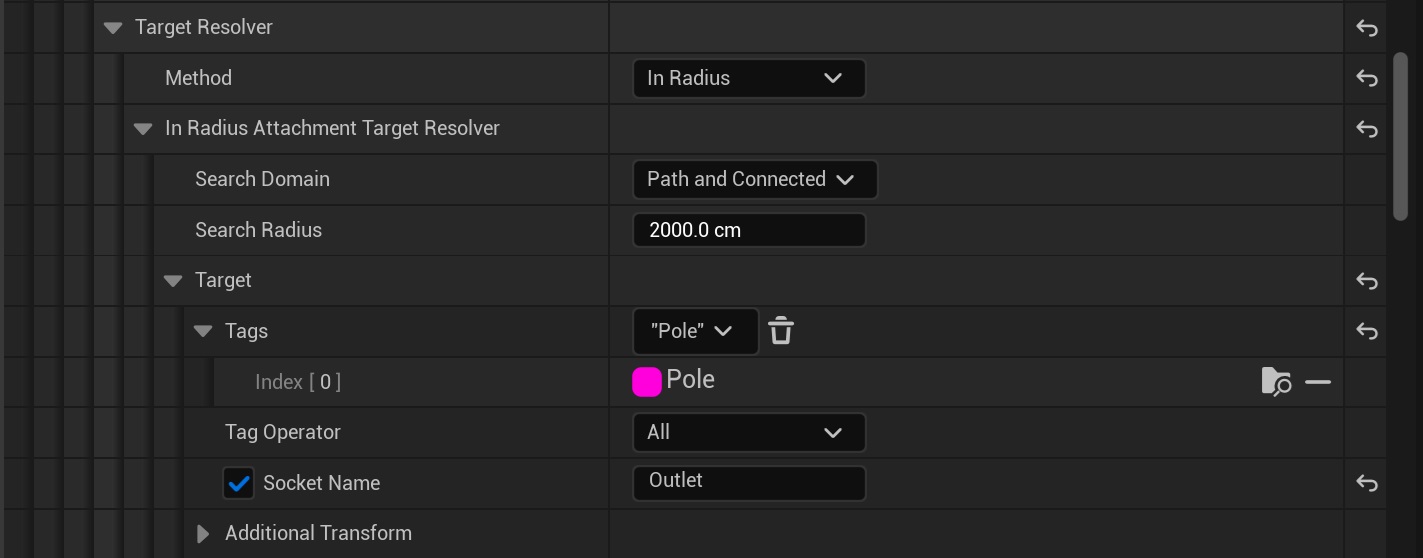
- Search Domain - determines which components will be taken into account as potential attachment targets. The options
listed below are ordered from the ones taking the least, to the ones taking the most computation time.
- Same Path - will only accept components from the same Path.
- Path and Connected - will accept components from the same Path and Paths directly connected to this Path.
- Paths in Connected Network - will accept components from the same Path and all Paths connected to this Path, directly or indirectly.
- Any Spawned Path - will look into all components of all Paths on the level.
- Any Actor - will take into account components of all actors on the level.
- Search radius - determines the maximum distance the attachment target must be located within to be accepted. Note that the component may lay outside of this search radius if we also specify a socket name.
- Target
- Tags - specifies tags that are required for a component to be considered for selection. The component needs to have all specified tags to be accepted.
- Tag operator - whether all or any of the aforementioned tags must be present.
- Socket name - allows us to disable or enable attaching to a socket and defines the socket name we want to attach to. If the socket name is specified, but the component does not have a socket with this name, it will be discarded.
- Additional transform - an additional transform applied to the one found on the component, determining the final attachment target.
Along-Spline Resolver
The Along-Spline Resolver (EpAlongSplineAttachmentTargetResolver) locates attachment targets by traversing forward or backward along the PathSpline. It selects the nearest target along the spline that meets all specified criteria.
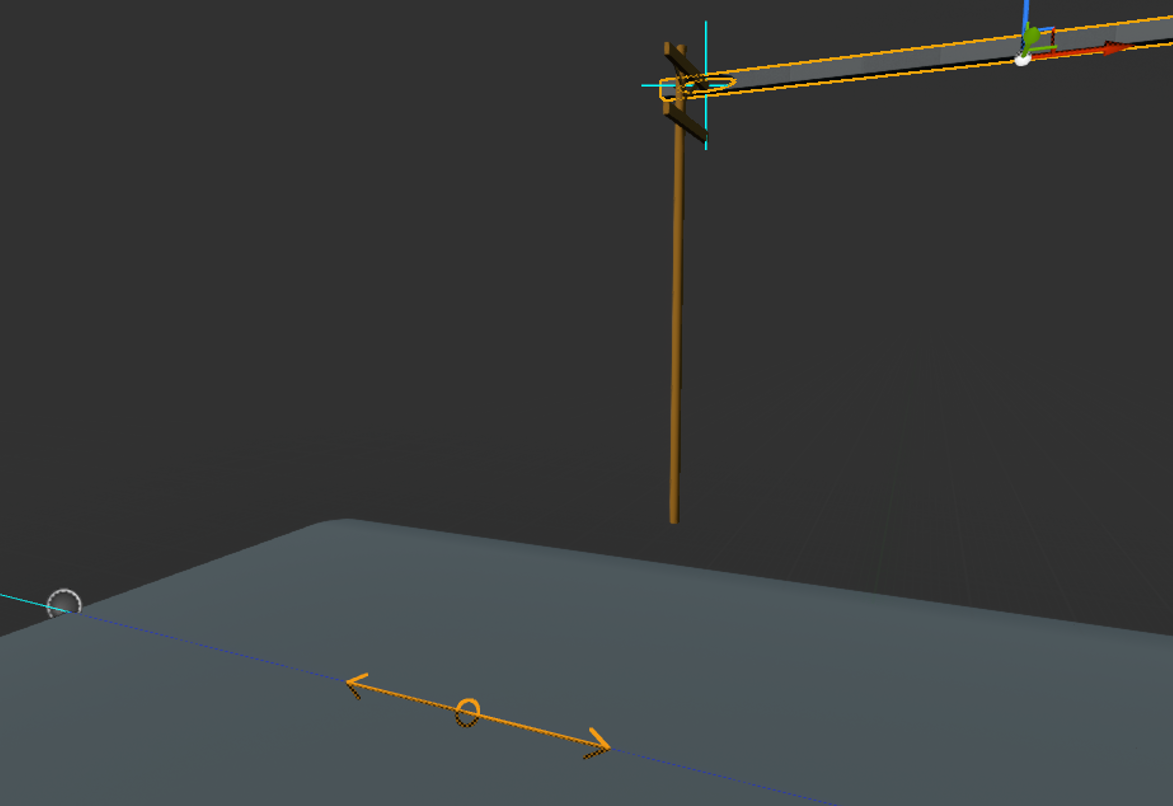
When this resolver is active, debug visuals appear in the Blueprint Editor viewport. These visuals indicate the search origin and the direction of traversal. If a valid attachment target is identified, it is displayed as a blue cross in the viewport.
Resolver setup
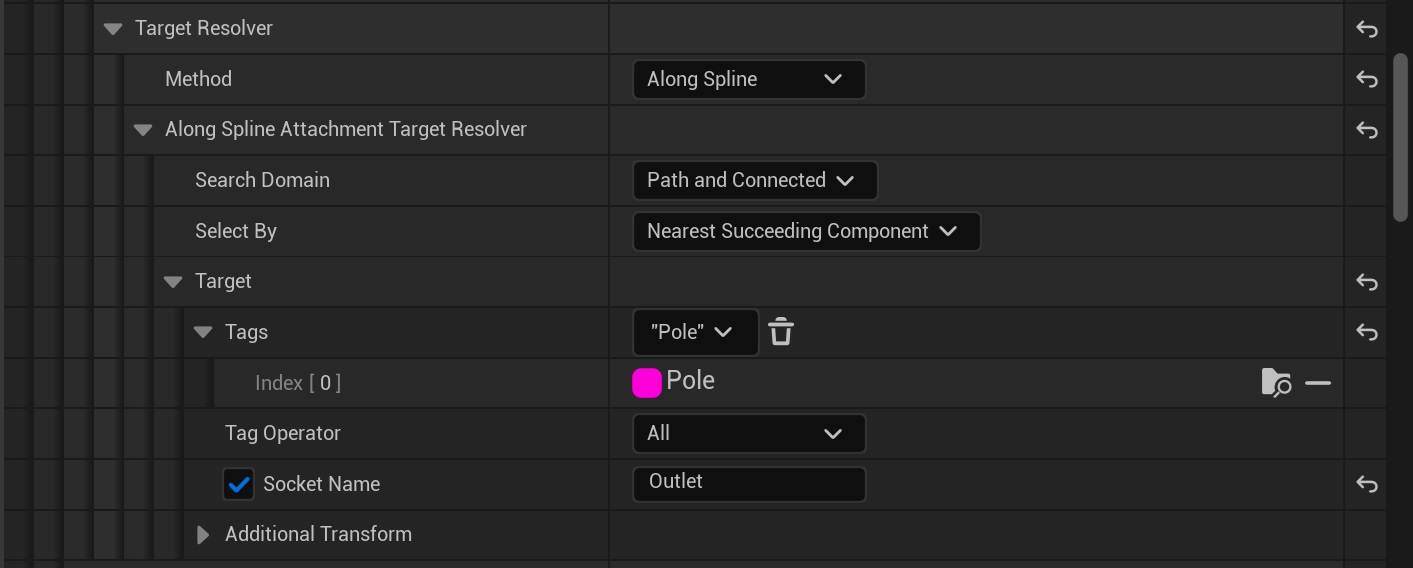
- Errant Paths 1.1 and later
- Errant Paths 1.0 and prior
- Search Domain - determines which components will be taken into account as potential attachment targets. The options
listed below are ordered from the ones taking the least, to the ones taking the most computation time.
- Same Path Template - will only allow components from the same Path template, that is components belonging to the same template instance, or another template group spawned at the same point of the Path spline.
- Neighboring Path Templates - similar to Same Path Template, but only allows components from the next or previous template along the Path spline.
- Same Path - will only accept components from the same Path.
- Same Path and Connected - will accept components from the same Path and Paths directly connected to this Path.
- Select By - configures how the target will be selected from a number of candidate components.
- Nearest Component - will select the component nearest to the search origin. Distance is measured along the Path spline.
- Nearest Preceding Component - will the component nearest, among components preceding the search origin. Whether a component "precedes" or "succeeds" a point is determined by the Path spline direction. Distance is measured along the Path spline.
- Nearest Succeeding Component - will the component nearest, among components succeeding the search origin. Whether a component "precedes" or "succeeds" a point is determined by the Path spline direction. Distance is measured along the Path spline.
- Target
- Tags - specifies tags that are required for a component to be considered for selection. The component needs to have all specified tags to be accepted.
- Tag operator - whether all or any of the aforementioned tags must be present.
- Socket name - allows us to disable or enable attaching to a socket and defines the socket name we want to attach to. If the socket name is specified, but the component does not have a socket with this name, it will be discarded.
- Additional transform - an additional transform applied to the one found on the component, determining the final attachment target.
- Search Domain - determines which components will be taken into account as potential attachment targets. The options
listed below are ordered from the ones taking the least, to the ones taking the most computation time.
- Same Path Section - will only allow components from the same Path section, that is components belonging to the same template instance, or another template group spawned at the same point of the Path spline.
- Neighboring Path Sections - similar to Same Path Section, but only allows components from the next or previous section along the Path spline.
- Same Path - will only accept components from the same Path.
- Same Path and Connected - will accept components from the same Path and Paths directly connected to this Path.
- Select By - configures how the target will be selected from a number of candidate components.
- Nearest Component - will select the component nearest to the search origin. Distance is measured along the Path spline.
- Nearest Preceding Component - will the component nearest, among components preceding the search origin. Whether a component "precedes" or "succeeds" a point is determined by the Path spline direction. Distance is measured along the Path spline.
- Nearest Succeeding Component - will the component nearest, among components succeeding the search origin. Whether a component "precedes" or "succeeds" a point is determined by the Path spline direction. Distance is measured along the Path spline.
- Target
- Tags - specifies tags that are required for a component to be considered for selection. The component needs to have all specified tags to be accepted.
- Tag operator - whether all or any of the aforementioned tags must be present.
- Socket name - allows us to disable or enable attaching to a socket and defines the socket name we want to attach to. If the socket name is specified, but the component does not have a socket with this name, it will be discarded.
- Additional transform - an additional transform applied to the one found on the component, determining the final attachment target.
As-Is Resolver
The As-Is Resolver is a simple pass-through resolver that uses the component's existing location and orientation as its attachment target without performing a search. This resolver is particularly useful for situations where CableComponents need to be anchored in place to prevent them from falling to the ground.
Common mistakes
If your attachment setup isn't working, check for these common issues:
- Ensure the mesh you are attaching to has the correct Tag assigned.
- Verify that the same Tag is set in the attachment's Start/End properties.
- Confirm that the attachment's MeshForwardAxis is configured correctly. Open the mesh asset you are attaching (e.g., the cable) and determine which local axis represents the "forward" direction for that mesh. Set this axis in the attachment settings.
- Make sure that cables are spawned after the object they should attach to. Use a different PathLayer for the cables and set that PathLayer to spawn after other objects.
Debugging
The Path actor includes debugging options to help troubleshoot attachments in the spawned Path. It is recommended to start by configuring a single cable or mesh on a short Path and ensuring it works correctly before adding multiple cables or extending the Path.
The debugging tools can display where components are searching for targets. Remember that component locations in the level may differ from their positions in the PathTemplates due to factors such as randomization, spawn-at-interval settings, Generation Callbacks, and other systems that can influence their placement.
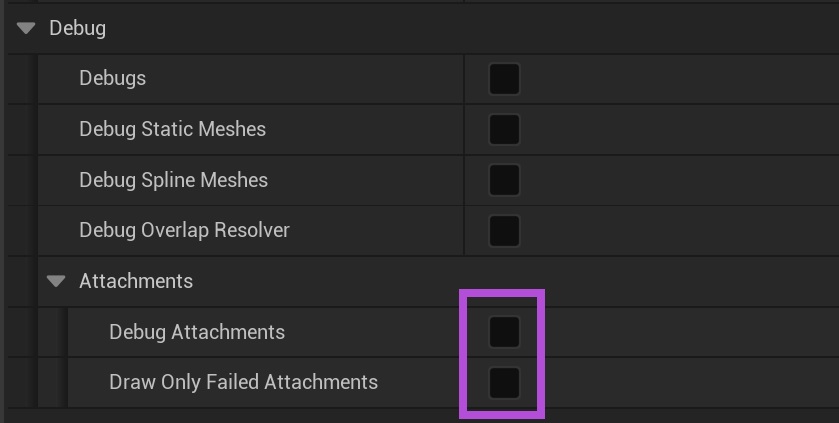
Make sure to regenerate the Path after enabling the debug options.